Due to time constraints I switched from my previous choice of model (Master Chief's helmet) and instead decided to go with an object I felt had a great amount of detail to show, would provide some challenge but one I would also be able to complete in the time I had remaining (2 weeks at that point).
I chose to create the sword from the anime series Attack on Titan; to start I found a reference image of the handle, blade and a real life version of the sword for my assessor to refer to when checking the materials of the sword I.e. the texture/colour/material of the grip.


I used the image above merely as a reference for the blade as I couldn't find a reference diagram with both the blade and the handle together and I wanted the reference I used for the handle to be as accurate to the sword as it is seen in the show.


Last time I used Quad Draw to make a complex model that had many curves and extruded faces that created depth. As this model is essentially flat and rectangular it did make sense to use the Quad Draw tool despite my mistakes with the previous model. Again I used the Quad Draw tool to create the exact edge loops for the model, like I had done for the MC helmet, however this time I knew I would be able to simply extrude the faces out to their proper positions once I had finished Quad Drawing.


Once the model was complete I used the reference to extrude the different parts to their correct heights. The parts which would be raised the least amount were moved to their positions and their faces deselected so that I could extrude again to the next height etc. until I had extruded each part into their proper positions.


I was really pleased with the quality of the model so far, especially considering how little time it took to reach this point compared to the MC helmet, however I did learn from my mistakes and thought through exactly how I would go about making this model. I made a few errors whilst Quad Drawing the little nub at the base of the handle so I had to go back and straighten it to the curvature of the handle itself.
I also began to use the Crease tool on a few of the edges as I would be smoothing the model once it was complete and when smoothing a model, the model's edges become very loose and curved. Using the Crease tool keeps the sharp edges even after smoothing, and for such a blocky metallic handle like this many edges are required to remain tight.
After this I proceeded to mirror the object and connect the vert to create a whole model.

I then proceeded to create the triggers for the handle and also began adding detail, starting with the grooves indented in the side of the handle.
When I drew the quads of the handle at the start I shaped 3 certain areas into a circle (or as close to a circle as I could) I did this as the handle has 3 major screws that bulge from the model on either side. With those circular faces already shaped I was free to extrude the faces down to create an indent for the screw heads to sit in. I then scaled 3 separate poly spheres down to fit in each indent and duplicated all 3 for the the other side of the handle. Later on once I take this model into Zbrush I will cut out the cross pattern on the screw heads.

Following both the real life image for reference and using the side image already in the viewport for the sizing reference I began to add detail to the opposite side of the handle. All this entailed was this curved extrusion from the handle itself, what made this piece important however came next.

The extruded curved piece was in fact the connecting piece of the cable that ran from the front hand guard to the aforementioned extruded piece.
To make this cable I used the curve tools included in Maya; with it I drew out the basic shape as seen from both my reference image and the real life image. From there I was able to use the soft select tool to shape the curve in a 3D space (as I had drawn the curve itself on a 2D space).
I feel as though this curve turned out well, I feel as though it's really close to the references however I also feel that any inconsistencies adds to the shape of the cable as it's freely suspended in that space and would not, realistically, sit there in a perfect curve.

I then found out that I had made a mistake in following the reference image, in this space between the handle grip and the blade insert section (the top section) the faces needed extruded up to a higher space. To do this evenly on both sides I selected the faces which needed to be extruded, extruded them and used the scale tool on the Y axis only to pull the faces out evenly on both sides.
From here I also had to fix the faces which would undoubtedly be inside one another, 2 faces occupying the same space isn't good for topology and UV unwrapping; after which I merged the separated vert's after deleting said faces.

Having completed the handle for the sword I imported my 2nd reference image so that I could begin modelling the blade, as the 2nd reference wasn't to the exact size I had made my handle from the previous reference I needed to scale down this 2nd reference to fit as closely to the handle I had made already (in size) as I could. From here I could begin Quad Drawing the blade itself.

With the topology of the blade drawn out I started to pull out the shape of the blade by extracting the faces I had drawn. Once the blade was in the correct shape and with an appropriate sloped angle of faces for the sharp edge I could delete the original faces I had drawn.

From here I simply needed to mirror the blade on the -Y axis and merge the copy to the original. However I faced an issue and that was the copy would not mirror as one would expect it to. To solve this problem I kept the copy and selects all of the copies faces and extracted them, this serrated the copy from the original and I could then pull the copy down on the Y axis. To make sure the copy was correctly aligned I used the Align tool.

With the copy and the original appropriately aligned I was free to combine the separate meshes. From there I went through each vertex and combined them so that there were no gaps in the mesh, I used the smooth preview button ("3") to check for any vert's I may have missed that had not been merged together.


Here I deleted the opposing faces on the handle and the base of the blade so that I could merge the blade to the handle through the Vertex Merge tool.


With my high poly model complete and smoothed in Maya I was now free to export the model as an Obj and import it into ZBrush so as to add the texture detail.


I made this coil with the assistance of Phil, we downloaded a coil image to use as our alpha for the texture. We applied the same process as adding the noise to create the grip texture to add the alpha in a looping pattern around the cable to create the coil.


My high poly model complete in ZBrush at a total of 60 million active points featured above..

I came across a number of issues whilst baking my high poly to my low poly. Firstly, for some unknown reason (possibly due to subdividing in ZBrush), the high poly model did not occupy the same world space as the low poly model, which was clear once I had decimated my high poly, exported/imported it back into Maya and saw that the high poly overlapped about half of the low poly. Also the high poly model, again probably due to subdividing in ZBrush, was smaller than the low poly; specifically the blade itself was longer on the low poly than it was on the high poly.
Since I was rectifying the position of the low poly to occupy the same space as the high poly in Maya I also reduced the length of the blade on the low poly to match the high poly and then proceeded to export the low poly again as an Obj file for baking.
I also found out that my low poly model had N sided faces. This meant that there were faces in the mesh that had more than 4 sides and this would ruin the bake in XNormals had I left them there. I used the Cleanup tool to find these N sided faces and a combination of the Insert Edge Loop tool and Multi-Cut tool to fix these faces
Another issue I came across was that parts of the model which were either adjacent to each other or parallel to each other would have textures baked onto them from the adjacent portion of the model where there should not have been any texture. This namely happened where the cable's coil texture was baked onto the hand guard and the scratches on the hand guard where baked onto the main body of the handle.
At first I tried, with advice from a friend, literally blocking the space between the adjacent components with simple poly planes. These planes would then be exported as Obj files and added in the low poly mesh section of X Normals when setting up the bake. Despite working with another students model this failed to work for mine. I was finally able to fix this by splitting my low poly and high poly models into the same 5 parts: the handle, hand guard, blade, cable and hammer (like a gun's hammer). By doing this and exporting and baking each piece separately it prevented X Normals from baking textures into unwanted places since the texture information that would have been needed to cause these issues was no longer there with the models split up.
This simply meant that once I took the baked low poly model into Quixel I would have to assign materials to 5 separate pieces and that these pieces would need to be re-formed and combined back in Maya, after being put through Quixel, to be exported as a single model to be set up in Unreal 4.


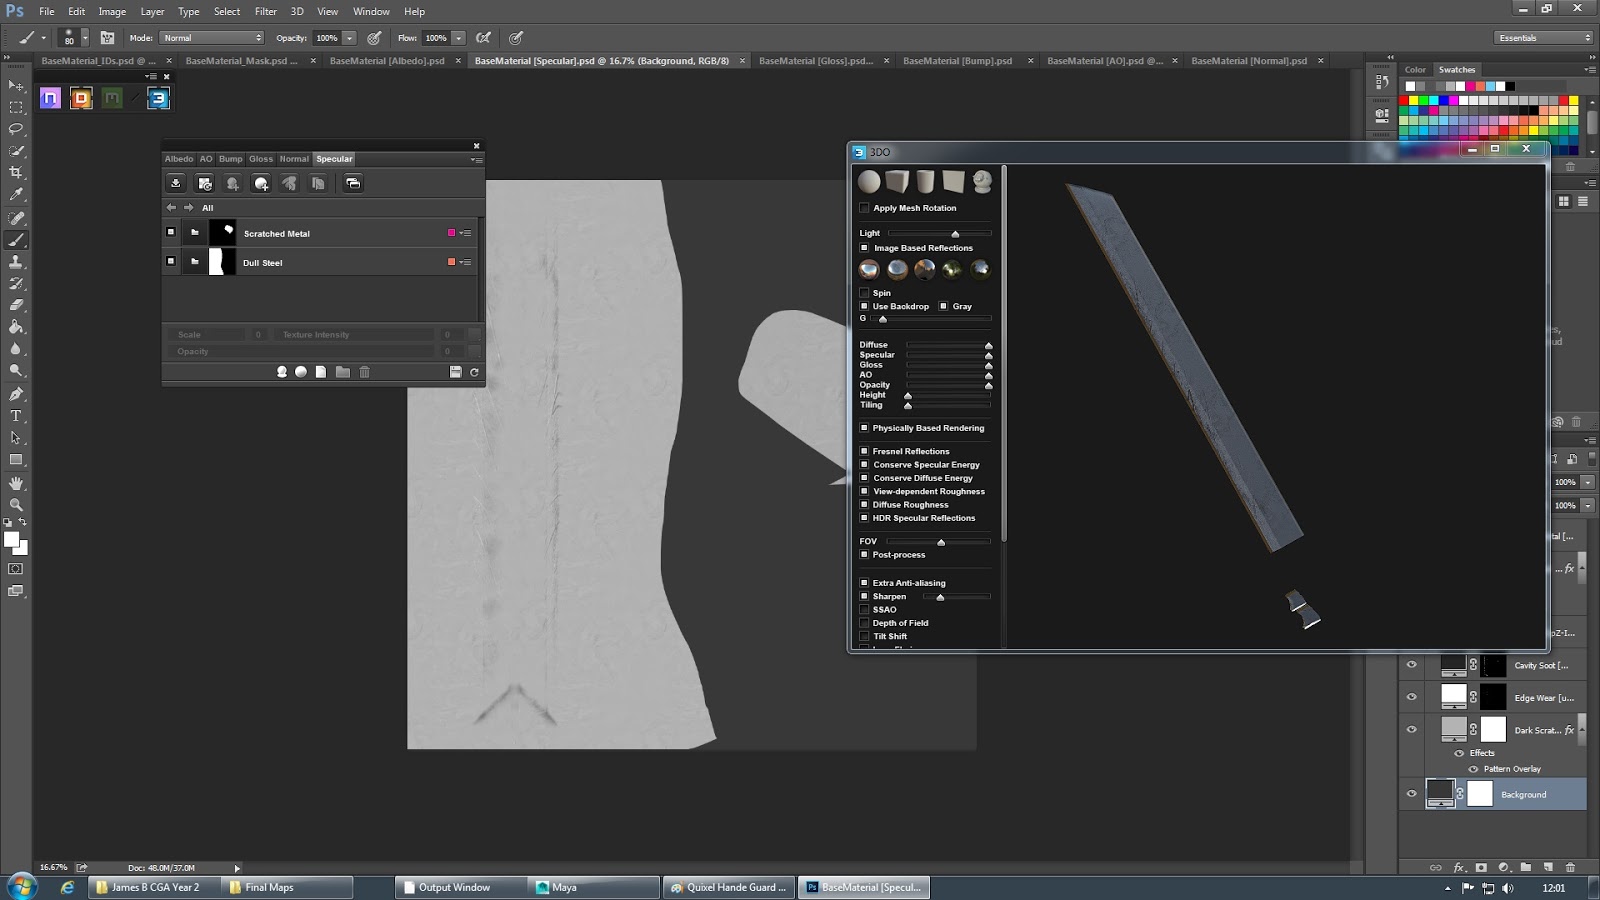


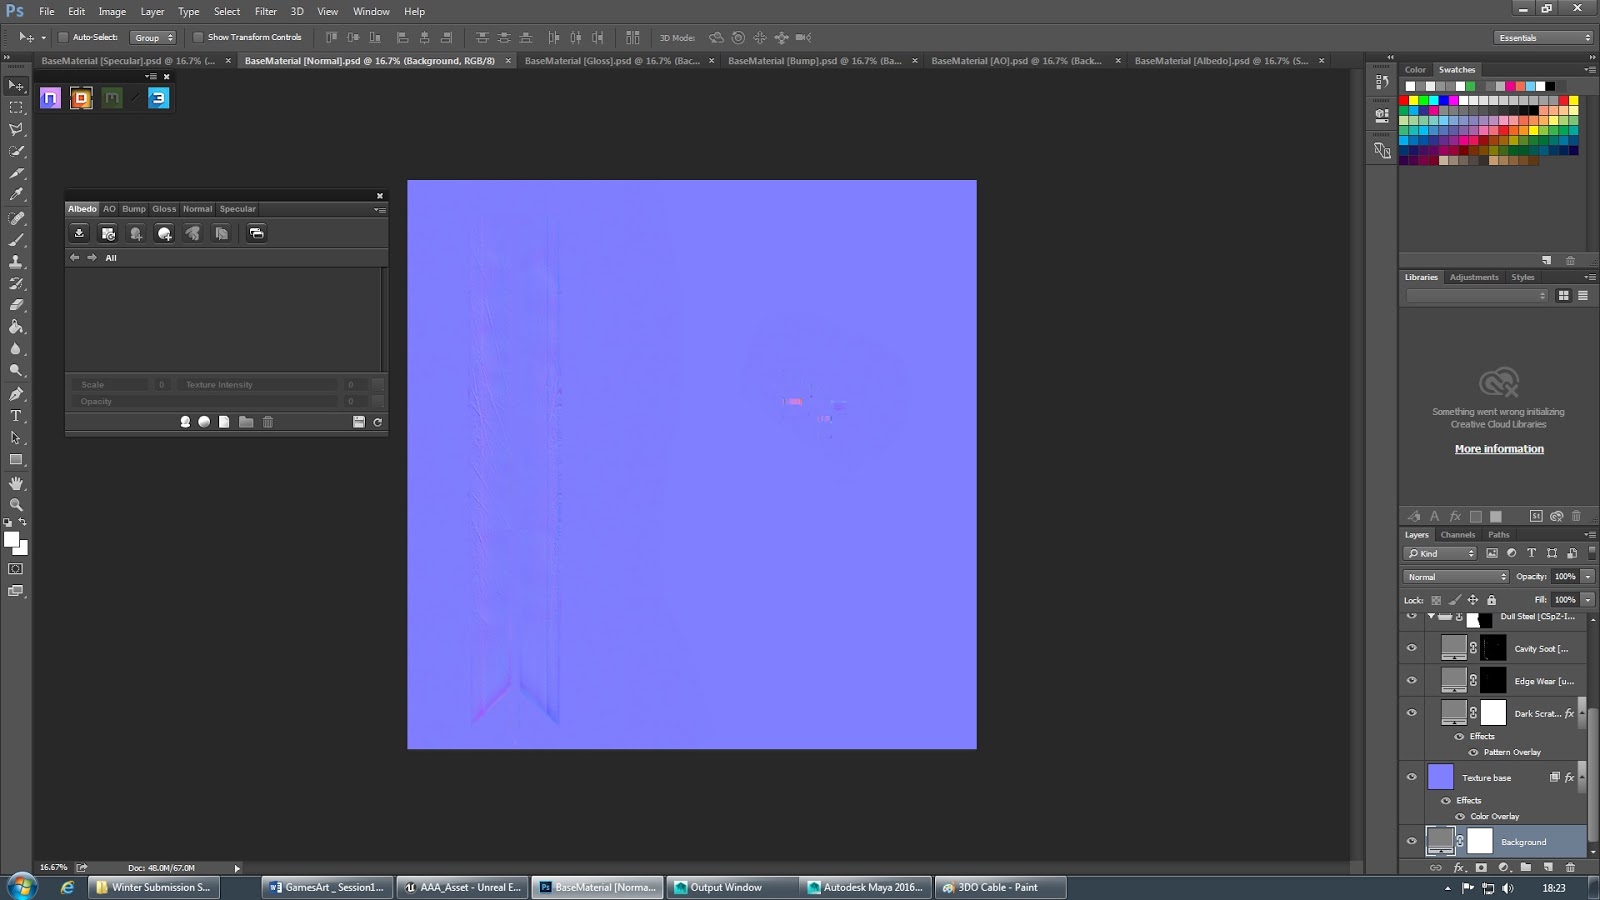
This is the prime example of where I needed to go into the RGB channels of the Cavity map and the Normal map to fix issues I was having with the material in Quixel. The issue in question was the model in 3DO was showing a black hole in the mesh; to fix this I went into the RGB channels of the Normal and Cavity map, used the colour picker tool, with a soft edge brush and slowly painted over the break in the maps. This can be seen in the normal map above where, towards the right hand side, you can see a distinct patch where the map has been edited to fix the issue.


In Unreal I started to apply the maps generated by Quixel to individual shaders and applied these shaders/materials to the appropriate portion of the model; since my model had to be baked in 5 parts, 5 parts had to be detailed in Quixel, giving me 5 shaders to apply.


No comments:
Post a Comment